To let you know that I know what I’m talking about I’ll give you a bit of a background story: I have been working on WordPress-based websites (including this one!) for more than a few years now. I’m currently running four websites which are all based on WordPress and use the GeneratePress theme.
If you’re unsure of what theme to go with, look no further than GeneratePress. It’s the cleanest and fastest theme out there. The developer who brought us GeneratePress has also released GenerateBlocks which add four absolutely fabulous blocks to the block editor.
You might have guessed it from the words above, but I’ve converted all of my sites to use the block editor. I don’t understand the hate it gets, I like it and I use it all the time. With that out of the way, let me tell you how you can speed up your WordPress workflow.
Reusable Block to Regular Block
The first thing I’m going to tell you about was added in one of the more recent updates and is possible the biggest time saver in my personal WordPress workflow across all of my websites: you can convert any Reusable Block into a Regular Block. That might sound a bit counterintuitive at first because Reusable Blocks are meant to remain unchanged. Right?
Take this scenario: when using my YouTube block (the one you saw at the beginning of this article) I want the design to stay the same whenever I add it in the block editor. I want the border, the button, and everything else to be there every time I embed it in an article. But the content, i.e. the linked YouTube video, has to be changed depending on the article.
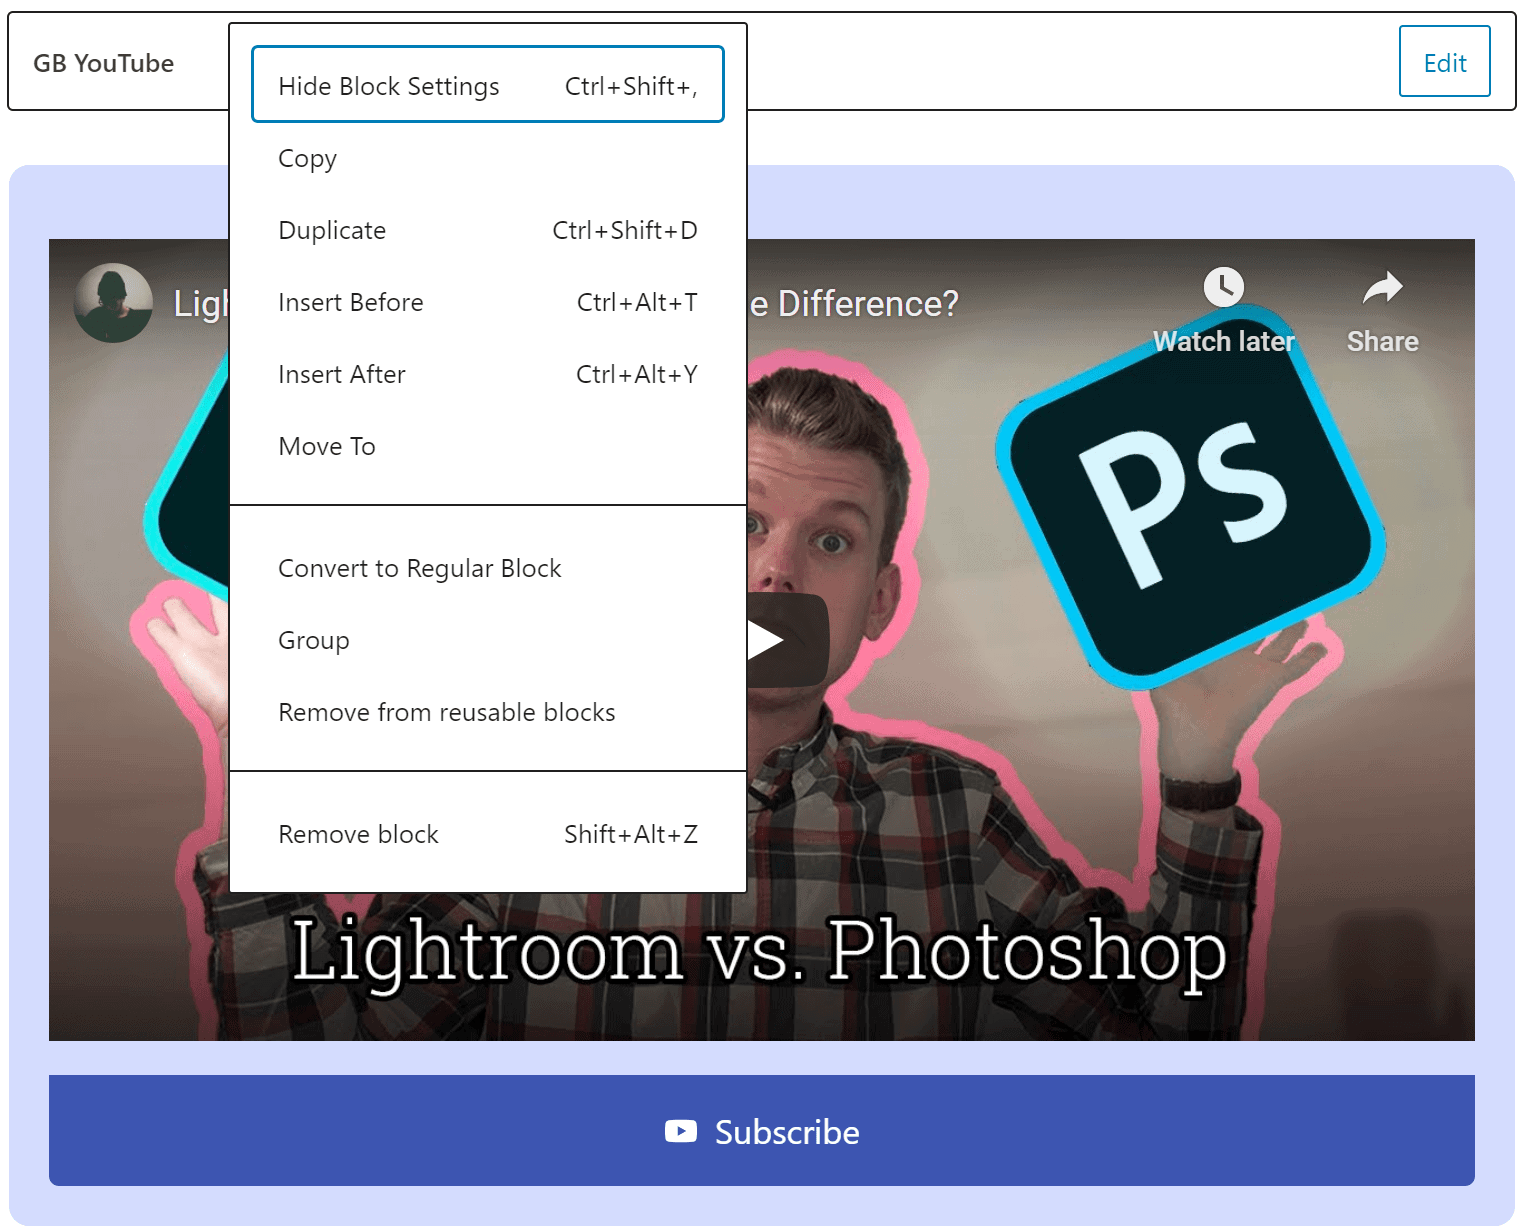
To achieve that, I turned my original YouTube block into a Reusable Block. And now every time I need it I will add the Reusable Block in the block editor, turn it into a Regular Block, and swap the video URL. The design remains uniform across all of my articles but the content changes depending on where it is.
Keep in mind that when changing a Reusable Block into a Regular Block it becomes just that and nothing more. It is no longer related to the Reusable Block in any way. So if you were to edit the reusable block the regular blocks won’t be affected.
Copy/Paste blocks
You can copy and paste individual blocks and even multiple blocks by selecting them while holding down the Shift key. This even works between different websites. I can copy any block I’ve created on one website and paste it into the block editor of another website. This does obviously require that you have the same blocks installed on both sites. As I use GenerateBlocks on all of my websites that isn’t much of a problem. The added bonus of using GenerateBlocks is that I can place all my blocks inside a container and copy the whole container.
I created the comparison box below using the block editor and GenerateBlocks on this website and then simply copied it and pasted it on to the others. You’ll see a very similar comparison box in this article on which Raspberry Pi is best suited for running Home Assistant on. All I had to do was change the colours and make it reusable, so I could place and edit it using tip number one.
Camera
Fujifilm X-T4
Resolution: 26.1 megapixels
Sensor: Backside-illuminated APS-C X-Trans CMOS 4
EVF: 1280 x 960
IBIS: Up to 6.5 stops
Video: 4K/60fps, 10 bit
Lens
Fujinon XF16-80mm F4 R OIS WR
Focal length: 16-80mm
Glas: 16 elements in 12 groups
Aperture value: F4
Lens
Fujinon XF10-24mmF4 R OIS
Focal length: 10-24mm
Glas: 14 elements in 10 groups
Aperture value: F4
Changing the default colour palette
You can change the default colour palette of your theme and your blocks. I already have a full write-up on how to do it here. You will need to install a plugin and enter a few lines of code. Feel free to copy the code from my article. If you have defined the colours you want to use on your website I suggest you do this. It will speed up things when deciding on colours for your blocks. And you won’t have to open your design guidelines and copy the hex code any more.
Pasting screenshots
Screenshots, and any other images, can be pasted into your articles without having to add an image block. This might not be relevant to all but because I write many guides I use it all the time. On Windows, you can click WIN+SHIFT+S to take a screenshot. That screenshot is then automatically copied to the clipboard. On WordPress, you can then simply add a paragraph and press CTRL+V to paste the screenshot into it.
Pasting anything
You can paste just about anything as a paragraph. For example, if you copy the URL from a YouTube video you don’t have to create a YouTube block for that video to be embedded. Simply paste the URL and it will be automatically turned into a YouTube block. The same goes for tweets and any other blocks WordPress supports.
Drag and Drop
You can drag and drop images directly from Windows Explorer into the WordPress block editor. You don’t have to first add an image block or anything. Simply drag and drop the image and it will be uploaded and placed in your article. The same goes for the featured image. You don’t have to click on the box to upload it, you can simply drag the image from Windows Explorer on to the box.