This guide will teach you the basics of manually adding Google AdSense ads to your WordPress website using the fantastic GeneratePress theme. All of this was done with as few plugins possible but I do recommend you use my suggestion as it does offer many advantages without hurting your website’s performance or being too intrusive.
What is not within the scope of this guide is what you have to do about cookies and how you have to declare them in various policies. I will also not be showing you how to add a cookie bar. There are numerous guides on how to do both to be found online. Google itself provides a guide on how to comply with the rules laid out in the infamous GDPR. Depending on where you are and what regions you are targeting, other policies might also apply.
A quick word on AdSense ads
Ads on websites, especially those coming from Google AdSense, are a bit of a hot potato, be it on GeneratePress websites or anything other. On the one hand, numerous visitors absolutely hate ads and use all types of ad blockers to hide them wherever and whenever possible. But, on the other hand, developers and publishers have to somehow cover their costs. After all, running a website doesn’t come for free. If you ask me it’s a fair trade-off for the content you get.
Because I research and write content for this website in my own free time I don’t want to be wasting a load of money while investing many hours a week into any project. At the very least, I want to cover my hosting and domain costs and that’s what I’m just about able to do in a good month. For readability’s sake, I do try to keep my in-article ads to a minimum and instead use headers, footers, and sidebars for ad placements.
If you do want to browse this website without a guilty conscience, you will find a donation link and various affiliate links in the sidebar. Every bit helps!
Why I stopped using AdSense Auto Ads
Until not too long ago, I was using Google’s AdSense Auto Ads. Auto Ads are meant to revolutionize the way AdSense ads are placed on websites. Some clever machine learning would figure out what ad to put in what position and it would be an optimal experience for both reader and creator.
And AdSense Auto Ads would do all of that with minimal coding. All you have to do is copy a few lines into your website’s header, which you can do by editing GeneratePress’ header.php file. With those lines added, the setup would already be complete.
But, as I soon was to discover, AdSense Auto Ads aren’t quite where they promise to be yet. Using the function, ads would appear in my page heroes, blocking the background, in between the steps for a recipe or attached to galleries and images without any padding.
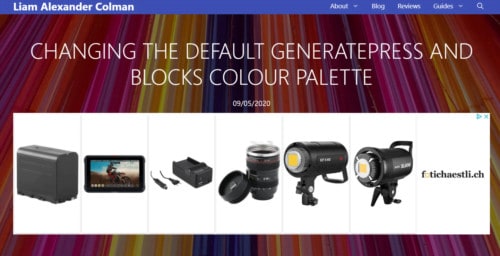
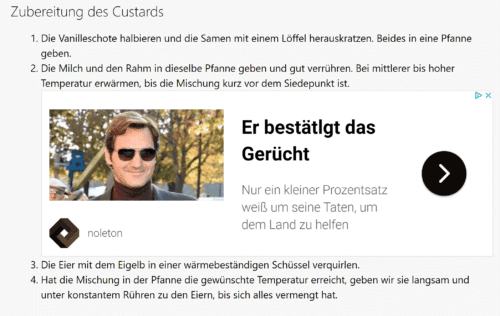
This made for an awful reading experience and surely turned some of my visitors in the direction of ad blockers. I’m pretty confident this also led to more accidental clicks which could, in the worst-case scenario, eventually lead to my AdSense account being banned.
Manually placing AdSense ads wins (for now)
It was obvious to me that I would have to rid all of my GeneratePress websites of AdSense Auto Ads and return to placing ads on them manually. Before I set out to do just that, I set up a few guidelines for the ads appearing on my various websites:
- They had to be clearly separated from my content. If possible in their own container.
- They should interrupt the reading experience as little as possible.
- Despite the previous two requirements I still wanted to get a decent number of impressions and, if possible, also clicks.
With that in mind, I set out to create ads based on my three requirements. There are numerous plugins for WordPress that will automatically place ads for you on your GeneratePress website. But just like with the AdSense Auto Ads, I wasn’t going to trust some machine with the layout of my websites.
That is where the brilliant GeneratePress Elements, which are a part of GP Premium, came into play. I wasn’t looking forward to editing each individual post and page to place some ads. So, I figured I could use Elements to automatically place my ads but still have full control over the where they appear. Because of the large number of hooks available, GeneratePress is the perfect theme for adding AdSense ads in as little time as possible.
Advanced Ads and GeneratePress
Despite what I mentioned earlier, I did end up using a plugin for certain functions. The good news is that I have found a very nice and easy-to-use plugin called Advanced Ads. This plugin won’t bug you too much about paying for a pro version and the free version should cover all of your needs to start off with.
In this guide, I will be using Advanced Ads to convert the AdSense code into a neat little shortcode which can be placed on pages, posts, and in GeneratePress Elements. That, plus some basic styling and making sure the ads look good both on smartphones and desktop-class devices.
What you will need to add AdSense ads to GeneratePress
To be able to work through this guide you will need to have an active AdSense account. Keep in mind that when you are first accepted it might take some time until your website is ready to receive ads.

You will obviously also need to be using the GeneratePress theme on your WordPress website. This guide will be making use of a feature specific to that theme and it is only available in GeneratePress Premium. Another requirement is that you have to have the plugin Advanced Ads up and running.
Configuring AdSense ad units for GeneratePress
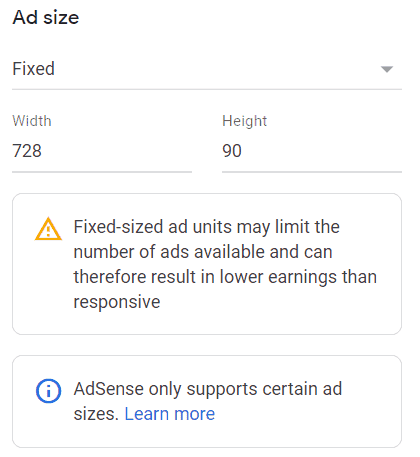
To start off with, I will not set up any responsive display ads because I do not trust AdSense to not mess up my GeneratePress website’s layout. What I did instead is configure fixed sizes for my display ads. Because I had no idea what sizes to pick I used a handy guide from the website wpbeginner.com as a reference. Having a fixed size should also help reduce your website’s CLS which is something Google is currently highlighting more frequently in the Search Console.
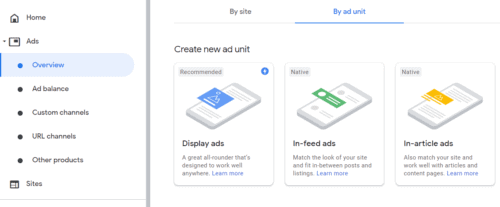
To create new ad units simply click on Ads in the AdSense menu and select Overview from the dropdown. Then select the tab By ad unit at the top of the page.
AdSense in-article ads
The first ad we’re going to be setting up is an in-article ad. This might sound as if I’m going against my word because these can only be responsive and you aren’t able to set a fixed size. To my defence, my testing has shown that they don’t often vary in size, and they do embed very well into posts. They also allow for some very basic styling, such as selecting the font and colour, which might increase the click-through rate.
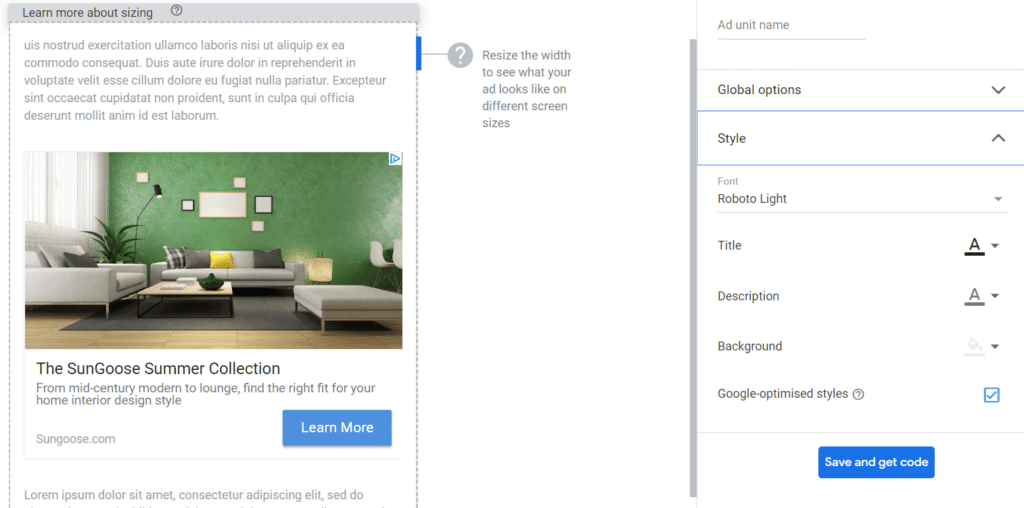
Once we’ve finished setting up the ad we can give it a name at the top of the page and save it. We won’t be needing the code yet so just ignore the message that pops up. You can always look up the code later.
AdSense display ads for GeneratePress
While we are in AdSense we may as well set up the rest of our ad units for GeneratePress. To accomplish this, you simply click on the big button with the description Display ads (as seen here). Then enter your desired width and height and save it. I went with the following formats for most of my websites:
- Medium rectangle (300×250)
- Mobile leaderboard (320×50)
- The billboard (970×250)
- The half page (300×600)
- The desktop leaderboard (728×90)
Setting up Advanced Ads for GeneratePress
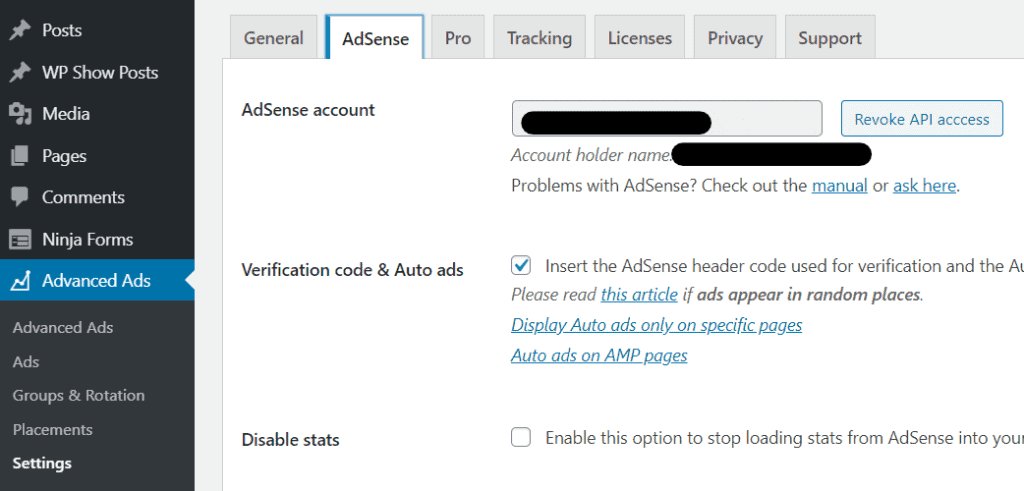
We can now start importing our ads using the aforementioned Advanced Ads plugin. Before we can do that we have to link our AdSense account. Luckily, Advanced Ads does most of the work for us and all that is left to do is done with the click of a button. Simply go into the Advanced Ads settings, select the AdSense tab, and click on Connect to AdSense.
This will open a window from which you can select the Google account you used to set up AdSense. A code will appear which you will, in turn, have to paste into the Advanced Ads settings. You should now have successfully linked the two.
Setting up AdSense in-article ads in Advanced Ads
The first ad we’re going to add is our in-article ad. To achieve that, we can click on Ads in Advanced Ads. You will then have to select AdSense Ad from the list. This should give you an overview of all the ads that have been created in AdSense. If there’s something missing you can simply click on the refresh icon in the top right-hand corner of the list.
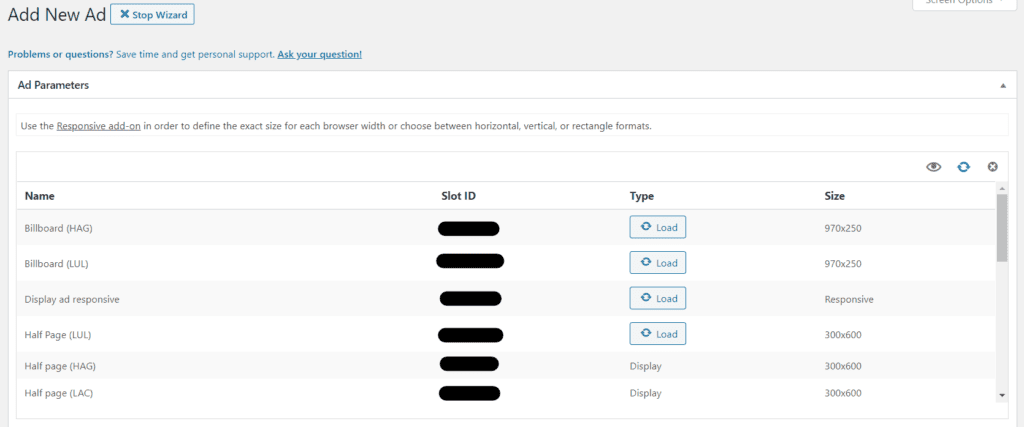
When selecting an in-article AdSense ad, a warning will pop up. No worries, this is to be expected. It just means we have to enter the ad’s code manually as Advanced Ads can’t automatically import it. You will only have to do this once. Click on the option to insert an AdSense code. This will present you with a field to enter that code. Now head back into AdSense and find the appropriate ad unit. Click on the code icon (< >), copy your code, and paste it into Advanced Ads. With that out of the way, you can proceed.
And finally, you can select where you want the in-article ad to appear. Because there’s no way of setting up what I’m about to do using GeneratePress Elements, we’re going to let Advanced Ads take care of it. Select content from the options and you should be prompted to choose a certain paragraph. The ad will appear after the paragraph you define in that field. If you pick the second paragraph, an in-article ad will appear after the second paragraph on all of your posts.
Display ads in Advanced Ads
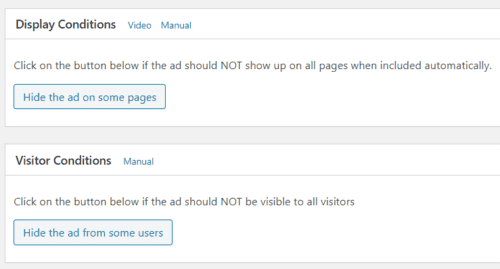
To add display-ads to Advanced Ads proceed with the same steps as with the in-article ads. However, things are considerably easier because you don’t have to add any code manually. Display-ads are imported into Advanced Ads without you having to copy or paste anything. But what you might want to do is add visitor conditions. Some AdSense ads set up earlier in this guide are meant to be displayed only on desktop browsers and others only on mobile browsers.
For example, you can set the half-page ad to be shown only on desktops. In contrast to the in-article ad, you don’t want to select any placement for the display-ads. That will be done using GeneratePress Elements. You will have to set up the visitor conditions for each of the AdSense display ads you’ve set up.
Placing ads in GeneratePress using Elements
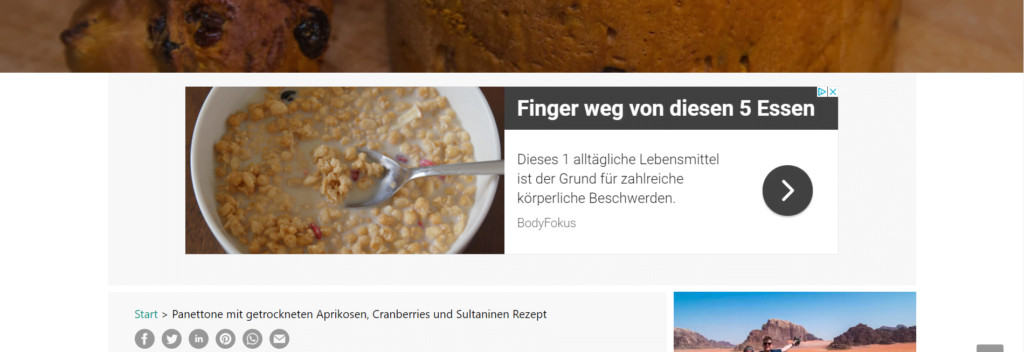
With all the individual ads added to Advanced Ads, you can finally start placing your ads on your GeneratePress website. The first ad will be a pretty basic one: a billboard between the page hero and the content. For mobile browsers, I will use a medium rectangle ad instead.
Creating a new group in Advanced Ads
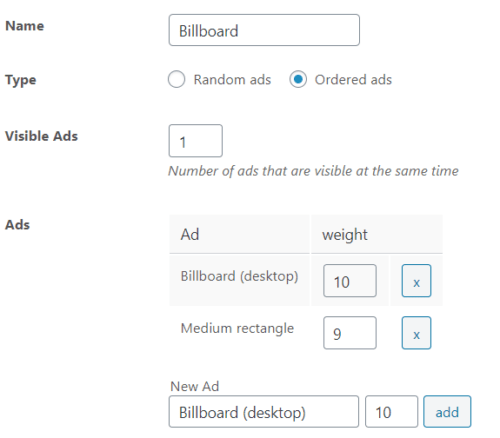
To make all of this possible you can use the groups feature inside Advanced Ads. Click on Add New Ad Group inside the Groups. This one shall be called billboard. With the group ready, click on edit. Select Ordered ads and leave the visible ads at one. Then add the two ads you want to be displayed. For me, that would be the billboard for desktops and the medium rectangle for mobiles.
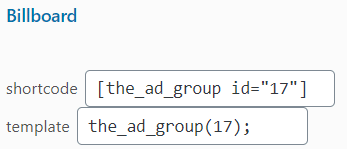
Update the group and head back into the overview. By clicking on Groups & Rotation in the Advanced Ads menu and hovering over one of the groups you will see a button titled Usage appear. Click on that button and a shortcode will appear which you can copy for the next step.
Adding AdSense ads to GeneratePress using Elements
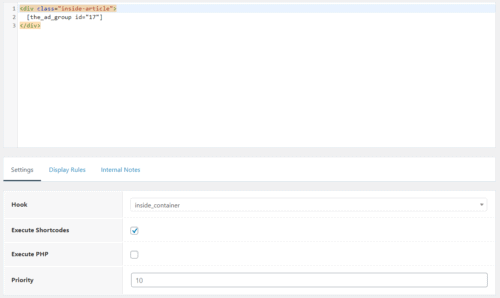
With the group created and the shortcode copied you can head over to the GeneratePress Elements and add a new one. This Element will be a hook. To give the ad its own container, we can place it inside a div container. Give this container the class inside-article and you should be sorted. Now paste the shortcode in between the div tags.
To place the ad above the content container but underneath the page hero, you can select the hook named inside_container. Alternatively, there is a handy visual guide available in the GeneratePress docs which will show you where the hooks are located. Make sure you enable the option to execute shortcodes.
Under the display rules, we will be able to select on which posts or pages the ad inside this GeneratePress Element shows up. Select Posts and leave the other option set to All Posts. Don’t forget to give this Element a fitting title. Hit publish once everything is done.
Using the display rules you could have this ad appear only on posts with certain tags or categories. Or you could have it appear on pages and not on any posts. The possibilities with GeneratePress Elements are endless.
Now that GeneratePress has its first AdSense ad, what next?
Just like that, you have added and published your first AdSense ad using GeneratePress Elements. Your ad will now appear on each individual post without you having to make any individual edits. Using these Hooks you can place ads anywhere around your content. Where you place your next ad is up to you.
I hope to have shown you the basics of how to add an AdSense ad to your WordPress website using GeneratePress. Based on this guide my hope is that you will be able to take care of the rest.
